Installing Drupal is a 4 step process. If you host with TheOpenHost, all you have to do is ask us and we’ll do it for you. But if prefer to do it yourself, or we are not your host, let’s learn how. First, here’s the overview:
Below we will go through each step, one by one.
If you visit https://www.drupal.org/ you will a link near the top “Get the code” — click on that. Then you will see a link “Download Drupal 8.2.6” — click that. Then you will see two green buttons to “Download tar.gz” or “Download zip” — click one of them; if you don’t know which, take the first.
Now that you have the Drupal files, we must put them on the server. If the server is local, then probably you know where it goes. If your server is remote, then you need to use either FTP or the File Manager of your hosting Control Panel to upload the file.
Once the file is uploaded, you must “unpack” it. On our File Manager, you just click on the filename and it will be unpacked for you. On other hosts, there may be a button for unpacking archive files.
Drupal is a database-driven CMS and won’t work without a database. On our Control Panel, there is a section called MySQL Databases. If you visit that, there is a section called “Create new database.” In there, just put “drupal” in the box and click Create. Other hosts have similar tools.
Note that with our hosting, your database name will not be “drupal.” It will actually be username_drupal where username is the username of your hosting account. On the MySQL Databases you will see this full name, however, so you don’t have to figure out yourself.
Now we are ready to actually install Drupal. You must visit the URL of your Drupal site in your browser and then you will see this:

If you do not see that image, then something is not right. You may have the URL wrong. If we host your site, just contact us and we will help. If someone else does, try asking them. 🙂
Hopefully you do however. If so, then pick your language and click “Save and continue.”
On the next screen, leave the “Standard” profile selected and click “Save and continue.”
On the next screen, you will see a warning about PHP OPcode caching not being enabled. This option is recommended by Drupal, but it’s not required, and our servers run better without. So just ignore this warning message and click the “continue anyway” link.
Now we are at the “real” installation screen which looks like this:

In the “Database name” box put the name of your database, which is username_drupal.
For the next two boxes, you can either create a user and password on the MySQL Databases page of your hosting Control Panel, or you can use the same username and password that we sent you in the original Welcome letter.
Put those in the other two boxes and click “Save and continue.”
If you have any errors, check very carefully what you put in the boxes and try again. If you can’t get it, just contact us and we will help.
When you get it right, Drupal will then install itself and you can watch the installer do its thing. When it’s done, you will see:
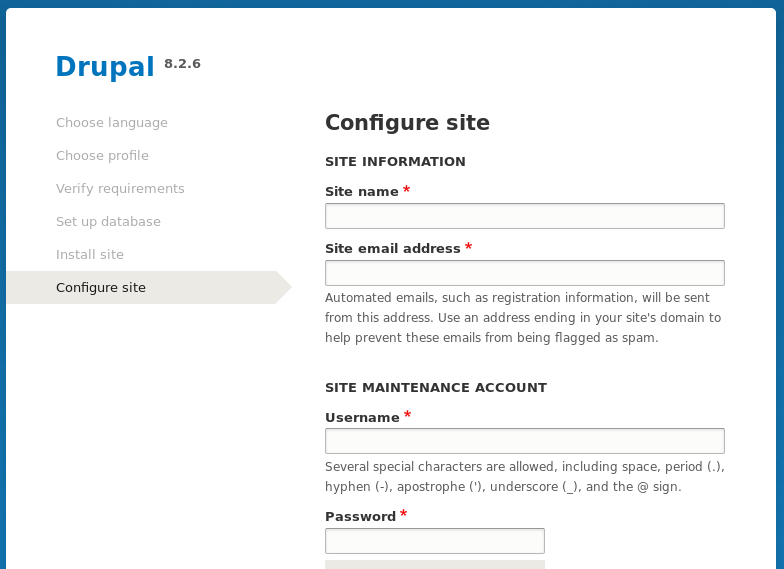
You can put in those boxes whatever you want. and click “Save and continue.”
That’s it. You just installed Drupal 8. 🙂